
Melding musical mastery with modern tech, you’re set to sync your MIDI keyboard to FL Studio. You’ll start by securing a suitable connection—be it via USB, MIDI, or perhaps a wireless adapter.
Once connected, you’ll configure FL Studio to communicate with your keyboard, a process that’s both straightforward and swift. Navigate through the options, customizing controls to fit your flow. You’ll assign your keyboard to channels, tweak the settings to capture every nuance of your performance, and ensure latency isn’t lagging behind.
It’s a simple setup that’ll soon see you sculpting sounds seamlessly within FL Studio’s digital domain.
If you are looking for a new MIDI keyboard, explore some of the best MIDI keyboards available today.
Key Takeaways
- Ensure you have the necessary equipment and physical connections, such as a compatible MIDI keyboard, USB cable, and computer with the appropriate ports.
- Configure the software by accessing the MIDI settings in FL Studio and enabling the MIDI controller.
- Choose a MIDI keyboard that is fully compatible with FL Studio and offers features like aftertouch, mod wheels, and a good keybed.
- Enhance your melody-making experience by utilizing the expressiveness of the MIDI keyboard and exploring FL Studio’s editing tools.
Before diving into the setup process, it might be helpful to learn more about what a MIDI keyboard is used for, especially if you’re new to music production or considering different MIDI keyboard options.
How to Connect a MIDI Keyboard to FL Studio

Before you can start laying down tracks, you’ll need to connect your MIDI keyboard to your computer and have FL Studio ready to go.
We’ll guide you through each step, from physically hooking up your keyboard to your PC or Mac, to configuring FL Studio for seamless MIDI integration.
With the right equipment and settings, you’ll be all set to bring your musical ideas to life.
Essential Equipment: Identifying what you need (MIDI keyboard, computer, FL Studio software)
To successfully connect your MIDI keyboard to FL Studio, you’ll need three core components:
- A compatible MIDI keyboard: Your instrument, your voice, your creative extension.
- A computer: Your digital canvas, where magic comes alive. Make sure your computer is updated and has the necessary ports for a USB cable connection.
- FL Studio software: Your toolbox of endless possibilities. The FL Studio software should be the latest version for the best experience.
- USB Cable/Driver: The bridge that connects your musical ideas to the world. Remember to install the latest driver to ensure a smooth setup and let your creativity flow uninterrupted!
Step-by-Step Guide: Physically connecting the MIDI keyboard to a PC or Mac
Plug your MIDI keyboard into your computer’s USB port using the provided cable to begin the setup process in FL Studio. This essential step is how you’ll connect your MIDI keyboard to FL Studio. Ensure that your keyboard’s power switch is turned on if it has one.
Here’s a quick reference table to check you’ve got everything right:
| Step | Action |
|---|---|
| 1 | Locate the USB port on your computer. |
| 2 | Take the USB cable that came with your MIDI keyboard. |
| 3 | Connect the USB cable to the MIDI keyboard’s USB port. |
| 4 | Plug the other end of the USB cable into your computer’s USB port. |
| 5 | Turn on the MIDI keyboard if necessary. |
Now your MIDI keyboard is physically connected and you’re ready to move on to configuring it within FL Studio.
Software Configuration: Setting up FL Studio for MIDI integration
Having physically connected your MIDI keyboard, you’ll now need to configure FL Studio’s settings to recognize and utilize your device. Dive into the software configuration by heading to the MIDI settings under the Options menu. Here’s what you need to do:
- Click on the Options menu, then select MIDI Settings to enter the soul of your setup.
- In the MIDI Options window, find your MIDI controller listed under Input settings.
- Hit the Enable button with a sense of achievement, as you’re now linking your musical imagination to FL Studio.
- Ensure your MIDI keyboard appears in the list and is ready for action, confirming your path to sonic exploration is clear.
Feel the excitement as you’re on the brink of unleashing your creativity through your newly integrated MIDI keyboard and FL Studio!
MIDI Keyboard Compatibility with FL Studio
Before you start making music, you’ll need to check if your MIDI keyboard is fully compatible with FL Studio.
Look for keyboards that specifically mention FL Studio integration or have assignable controls for seamless operation.
Features like aftertouch, mod wheels, and a good keybed can greatly enhance your production experience in the software.
For more information on MIDI setup check out the Image Line’s MIDI setup wizard.
Determining Compatibility: What MIDI Keyboards Work Best with FL Studio
To ensure a smooth experience, you’ll need to choose a MIDI keyboard that’s fully compatible with FL Studio. But don’t worry, most MIDI keyboards are designed to work seamlessly with this powerful software. Here’s what to look for to find the perfect match:
- Ease of Integration: You want a keyboard that plugs in and plays nice with FL Studio without a fuss.
- Full Feature Utilization: Get a controller that lets you use all of FL Studio’s features – knobs, sliders, and pads included.
- Seamless Connectivity: Whether you’re going wired or wireless, your midi device should connect without any hiccups.
- Controller Type Versatility: From compact to full-sized, your choice should cater to your studio space and playing comfort.
Choose wisely, and your creativity will thank you!
Important Features to Look for in a MIDI Keyboard for FL Studio
While you’re selecting a MIDI keyboard that integrates well with FL Studio, it’s crucial to consider the features that enhance its compatibility, such as plug-and-play functionality and custom mapping options.
A good MIDI keyboard will act as an extension of your DAW, providing a seamless interface for inputting notes and manipulating sounds.
Look for a controller that FL Studio can instantly recognize, which will save you time and prevent any unnecessary hassle.
If you want to go wireless, ensure the keyboard supports Bluetooth MIDI, which offers flexibility and a clean setup.
Moreover, compatibility with USB-C connectors is becoming more important, so choose a keyboard that can adapt to modern connectivity standards.
For more information on buying MIDI controllers, check out this MIDI controller buying guide.
Advanced Configuration: Enhancing MIDI Keyboard Usage in FL Studio
Once you’ve connected your MIDI keyboard to FL Studio, it’s time to fine-tune your setup for maximum creativity and efficiency.
You’ll want to customize your MIDI settings, assigning specific port numbers and channels to streamline your workflow.
Additionally, mastering MIDI in the Piano Roll will unlock your ability to craft intricate melodies and harmonies with precision.
MIDI Setup in FL Studio: An In-Depth Guide
After connecting your MIDI keyboard to FL Studio, you’ll want to dive into the advanced settings to fine-tune its performance and integration within the software. Open FL Studio and head to the MIDI Settings under the Options menu to begin. From there:
- Install the latest drivers for seamless communication between your gear and FL Studio.
- Use a MIDI monitoring tool like MIDI-OX to troubleshoot and ensure signals are being sent and received properly.
- Enable your keyboard as a Generic Controller to unlock a world of customizability.
Ensure your creative flow is uninterrupted by having your MIDI setup perfectly aligned with your artistic vision.
Customizing MIDI Settings: Port Numbers and Channel Assignments
Diving into the MIDI Settings from within FL Studio, you’ll find the options to customize your MIDI keyboard’s port numbers and channel assignments, which are crucial for precise control over multiple instruments and effects.
Assigning unique port numbers allows you to route different keyboards or controllers to specific virtual instruments. For instance, you may want your drum pads to trigger a drum plugin, requiring you to assign them to a dedicated channel that’s linked to your drum sounds.
Getting this right means when you hit a pad, you’ll get a kick or snare, not a piano note. Experiment with these settings to enhance your workflow and give you quick access to your full range of sounds without the hassle of constantly remapping your gear.
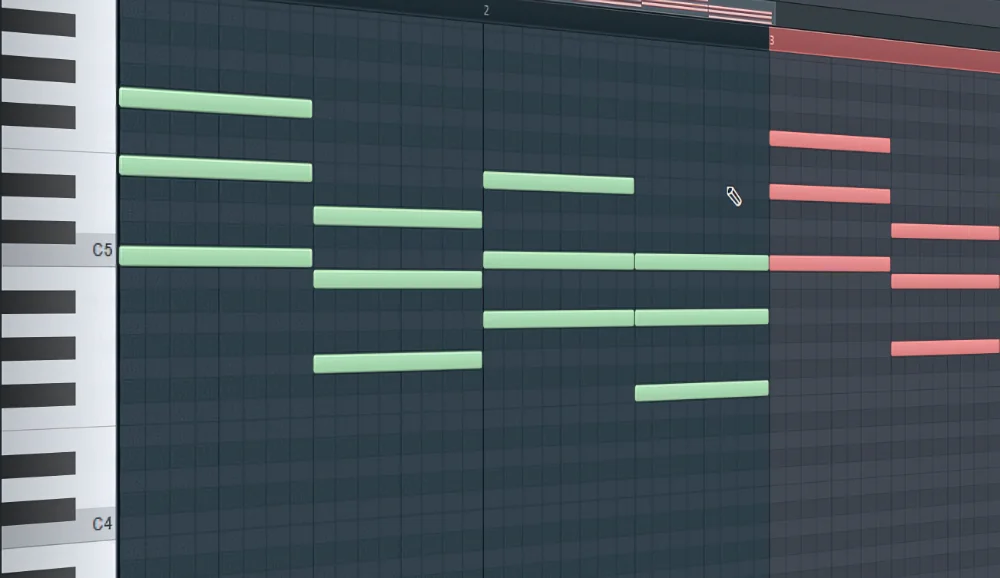
Utilizing MIDI in Piano Roll for Melody Creation
How can you leverage the MIDI keyboard’s capabilities to craft complex melodies directly in FL Studio’s Piano Roll? Once you’ve got your keyboard plugged in and recognized, the real magic begins. You can lay down your initial ideas, then dive deep into the Piano Roll to refine every note to perfection. Here’s how you can enhance your melody-making experience:
- Feel the thrill of your fingers flying across the keys, weaving musical stories.
- Experience the joy of capturing every nuance with precision velocity controls.
- Revel in the satisfaction of sculpting pitch-perfect harmonies.
- Savor the moment when a simple riff evolves into a full-blown masterpiece.
Advance your melodic skills by intertwining your keyboard’s expressiveness with FL Studio’s powerful editing tools. Keep exploring, and watch your creations come to life!
Recording and Creating Music with a MIDI Keyboard in FL Studio
Once you’ve connected your MIDI keyboard to FL Studio, you’re ready to start laying down your musical ideas.
Begin by mastering basic recording techniques to capture your performances accurately.
Then, you can shape your melodies and harmonies using FL Studio’s powerful Piano Roll editor to refine your compositions.
Basic Recording Techniques Using a MIDI Keyboard
After you’ve connected your MIDI keyboard to FL Studio, you’re ready to dive into the basics of recording and crafting your music. The process is straightforward, and with a few steps, you’ll be laying down melodies that capture your creative vision.
- Feel the excitement as you select your MIDI keyboard within FL Studio and strike the keys, breathing life into your musical ideas.
- Experience the thrill of managing MIDI connections, empowering you to control the flow of your music.
- Revel in the satisfaction of keeping your hardware up-to-date, ensuring seamless creative sessions.
- Delight in troubleshooting like a pro—adding instruments, opening plugins, and hearing your music come alive through the speakers.
Crafting Melodies and Harmonies in FL Studio’s Piano Roll
While you’re mastering the basics of recording with your MIDI keyboard, you’ll also want to explore how to create intricate melodies and harmonies in FL Studio’s Piano Roll. Dive in by playing and recording your musical ideas directly.
Fancy a specific sound? Head over to the Channel Rack, pick a plugin, and let your fingers dance across the keys to craft your melody.
Don’t forget to open the Piano Roll for any plugin to refine and experiment with your creations. If you’re looking for advanced techniques, consider grabbing ‘The Ultimate Melody Guide’ for quick, impressive results.
Most importantly, keep practicing. The more time you spend with your MIDI keyboard and FL Studio, the better your compositions will become.
Troubleshooting Common MIDI Keyboard Issues in FL Studio
Sometimes you might hit a snag when your MIDI keyboard isn’t responding in FL Studio. Let’s tackle how to fix connectivity issues and get those transport controls working as they should.
If you’re still stuck after the basics, we’ll guide you through advanced troubleshooting, including MIDI script installation and mapping your controls for a seamless music-making experience.
Resolving Connectivity Problems
If you’ve run into issues connecting your MIDI keyboard to FL Studio, start by checking that the device is properly plugged in and recognized by your computer. Remember, your MIDI keyboard doesn’t make sound on its own; it controls the virtual instruments within FL Studio. If you haven’t heard anything yet, you mightn’t have an instrument loaded in the Channel Rack, or your keyboard mightn’t be set up properly.
Here’s what you can do:
- Check Device Connection: Make sure all cables are secure and the keyboard powers on.
- Load an Instrument: Add an instrument like FL Keys to the Channel Rack.
- Update Drivers: Ensure your MIDI keyboard’s drivers are up to date.
- FL Studio Settings: Verify MIDI settings within FL Studio are optimized for your keyboard.
Addressing MIDI Controller and Transport Button Issues
Troubleshooting your MIDI keyboard’s controller and transport buttons often involves checking their mapping in FL Studio’s MIDI settings to ensure they’re configured correctly. If they’re not responding, first verify that your keyboard is compatible with FL Studio. Update the software and any drivers to the latest versions to prevent compatibility issues.
Next, check if there are any firmware updates for your MIDI keyboard. Follow the manufacturer’s instructions carefully when applying these updates. If problems persist, inspect all cables and connections for damage or loose connections, then try restarting your PC.
For a more in-depth analysis, use tools like www.midiox.com to test the MIDI signals. If you’re still stuck, consider joining online forums for additional support from other FL Studio users.
Advanced Troubleshooting: MIDI Script Installation and Mapping MIDI Controls
Occasionally, you’ll need to delve into advanced troubleshooting, such as manually installing MIDI scripts or meticulously mapping your MIDI controls, to resolve persistent issues with your MIDI keyboard in FL Studio.
If you find yourself stuck, remember:
- You’re not alone; many musicians face these challenges.
- Patience is key; deep breaths, you’ll get through the technical maze.
- Success is sweet; imagine the satisfaction when you hit those keys and everything works.
- Creativity awaits; this is just a stepping stone to your musical masterpiece.
Ensure you’ve installed the necessary drivers and your device appears in FL Studio’s MIDI settings. When all else fails, communities and forums are rich with fellow artists who’ve stood exactly where you stand, ready to lend a helping hand.
Frequently Asked Questions
How do I connect a MIDI keyboard to my FL Studio?
To connect a MIDI keyboard to FL Studio, you need to first plug in your keyboard into your computer via USB. Then, open FL Studio and navigate to Options then MIDI settings. Here, enable your keyboard from the list of devices.
What software do I need to connect a MIDI keyboard to FL Studio?
You dont necessarily need any additional software other than the drivers for your specific MIDI device (if required by the manufacturer) and FL Studio itself.
Can I use any USB port on my computer to connect the MIDI Keyboard?
Yes, you can use any USB port available on your computer as long as its functioning properly.
Do I have to configure any settings in FL Studio once my MIDI Keyboard is connected?
Once your MIDI Keyboard is connected, you may have to go into the MIDI settings under Options in FL studio and select or enable your device from there. This enables communication between the software and hardware.
Is there an ideal type of midi keyboard that works best with FL studio?
Any midi keyboard should technically work with FL studio as long it has standard compatibility features like USBMidi interface. However, some might come with extra controls such as sliders and buttons which could be mapped within FL studio for better control.
Why Is My MIDI Keyboard Not Detected in FL Studio?
If your MIDI keyboard isn’t detected in FL Studio, check its compatibility, update the drivers, and ensure it’s properly connected. Visit midiox.com to test its functionality or seek online community support.
How Do I Connect My MIDI Keyboard?
To connect your MIDI keyboard, plug it into your computer, ensure it’s powered on, and install any necessary drivers. Then, open your music software to configure the keyboard as your input device.
How Do I Use an External Keyboard in FL Studio?
To use an external keyboard in FL Studio, you’ll open the MIDI Settings, select your keyboard, and map the controls. This lets you play and record notes directly into your project.
Do All MIDI Keyboards Work With FL Studio?
Not all MIDI keyboards work with FL Studio; you’ll need to check your model’s compatibility and may have to install specific drivers or update firmware to ensure it functions correctly.
Final Thoughts
Connecting your MIDI keyboard to FL Studio is a straightforward process.
By ensuring your keyboard is compatible, properly connecting it to your computer, and configuring FL Studio’s MIDI settings, you’re all set.
Remember, if you encounter any issues, troubleshooting steps like checking connections and configuring software settings can help resolve them.
If you’re also interested in how to connect your MIDI keyboard to Ableton Live, check out our guide for more information.”
