Blog, Tutorials

How To EQ Piano In FL Studio: A Step-By-Step Guide To Perfection

By

Daniel Strongin

|

Updated:

|

15 minutes

read

A close up of a piano keyboard with black and white keys, creating the perfect sound.

EQing a piano in FL Studio can seem daunting at first, but with the right guidance it’s not as difficult as you think. Whether you’re an audio engineer or just getting started producing music, this step-by-step guide will make sure that your piano sounds its best. I’ll be going over essential tips and tricks to help get you up and running quickly so let’s jump right in!

First off, it’s important to understand what EQ is and why it matters for mixing pianos. Simply put, equalization (or EQ) is used to adjust the balance of frequencies within an instrument by boosting or cutting certain bands of frequencies. It’s one of the most powerful tools we have when sculpting our sound, so mastering how to use it correctly is crucial. With careful adjustment of your piano’s frequency spectrum, you can create a more balanced mix while making sure each note stands out clearly from the rest.

Finally, once you’ve got a handle on how EQ works there are some specific techniques that work especially well when dealing with pianos. We’ll cover everything from creating clarity through mid/side processing to adding subtle warmth with analog style saturation plug-ins – all guaranteed to elevate your mixes and take them to the next level! So if you’re ready for crystal clear sounding pianos then read on – let’s get started!

Overview Of Fl Studio

FL Studio is a powerful software program used for music production and recording. It’s user-friendly interface allows users to record and mix instruments, including piano, with ease. FL Studio offers many features that can be utilized in the equalization process; automation clips are especially helpful when setting up an EQ curve on the piano track. With these tools at your disposal, you will have all of the necessary components for creating a polished sound from your recordings. Additionally, FL Studio also provides various built-in effects which allow users to quickly modify their sounds as desired. With a little practice and patience, you’ll soon find yourself mastering the basics of equalization techniques within this platform. Let’s now move on to discuss some basic EQ principles which will help bring out the best in your recordings.

Basic Eq Principles

Equalization is like a painter’s palette. With equalization techniques, you have the tools to turn an otherwise dull and flat tone into something vibrant and dynamic. Understanding basic EQ principles can help you to shape tones with precision and accuracy.

Frequency bands are the first step in understanding basic EQ principles. Each frequency band holds specific sound characteristics that can be adjusted using various equalization techniques. Tone shaping begins by boosting or cutting each of these individual frequencies until you achieve your desired effect. It’s important to note however, that too much of any one frequency will cause distortion and create an unpleasant listening experience. Additionally, it’s essential to consider the dynamic range when setting up a piano track – this means avoiding drastic changes in volume between different sections of the song. This way, all elements blend together harmoniously without losing their unique identity.

Understanding how to use basic eq principles is key for taking full advantage of FL Studio’s powerful features within your mix. With knowledge comes power; knowing which frequencies need attention allows you to hone in on exactly what needs adjusting while creating balance throughout your mix.

Setting Up A Piano Track In Fl Studio

Now that you have a basic understanding of EQ principles, it’s time to set up your piano track in FL Studio. Starting with the basics, create an audio track and assign it to any available instrument – typically a Grand Piano or Acoustic Piano sound is preferred. You can then adjust the parameters such as volume, panning and reverb before moving on to more advanced settings.

Next, begin setting up your automation clips for each parameter; this allows you to easily control dynamics within specific areas of the mix. This will help provide some clarity throughout a busy mix and allow certain elements to stand out when needed. Additionally, make sure adjustments are made in small increments so as not to over-process the signal too quickly.

Once these preliminary steps are done, you’re ready to start utilizing equalization tools in order to shape the overall tone of your piano track. Here is where knowledge of basic EQ principles comes into play as you’ll be able to apply them accurately and effectively according to what kind of sound you’re going for. Keep in mind that subtlety is key here – don’t go overboard with drastic boosts or cuts! With patience and practice, perfecting your piano setup in FL Studio should become easy enough over time.

Utilizing Equalization Tools

EQ is an essential tool for sound sculpting. To begin, we must understand the basics of equalization tools and techniques to maximize our potential in fl studio. Equalizers are used to modify frequency response by adjusting individual frequencies or bands within a signal. This process can be done manually, using parametric EQs, graphic EQs, or shelf EQs. With these tools at hand, one has greater control over dynamic processing and sound shaping.

It’s important to remember that each instrument requires unique settings when it comes to frequency adjustment; no two instruments will have exactly the same eq needs. Additionally, various types of music require different levels of treatment with effects such as compression and limiting so make sure you experiment until you find what works best for your mix! With this knowledge in mind, let’s move on to fine-tuning with automation clips…

Fine-Tuning With Automation Clips

When you’re ready to take your piano-mixing skills up a notch, it’s time for fine-tuning with automation clips. Automation is one of the most powerful tools available in sound-shaping and can help bring out the best in your mix. Using this technique, you can adjust individual elements or parameters over time to create an organic feel that helps to enhance the overall soundscape.

With automation clips, you have complete control over how much of each parameter affects the track at any given moment. This gives you unprecedented flexibility in crafting the perfect mix. You can even use multiple automation clips on different elements simultaneously to create complex patterns that add depth and texture to your music. By taking advantage of these features, you’ll be able to shape and refine your audio like never before – creating a professional mix with ease!

Creating A Professional Mix With Eq

When it comes to creating a professional mix with EQ, there are several principles that must be adhered to. The primary goal is to create balance and clarity in the piano’s sound by cutting or boosting specific frequencies. It is important to understand how each frequency range affects the overall tone of an instrument before making any adjustments. In FL Studio, this can be done using the Mixer View’s Equalizer (EQ) function. With careful manipulation of the parametric controls, one can achieve a more polished sound for their piano track in no time at all. Additionally, it is essential to remember not overdo the equalization as too much boost or cut will make your song muddy and lifeless-sounding.

Now that you have created a balanced mix with EQ on your piano track, it is time to maximize its sound potential with strategic compression, reverb, delay and other effects processing techniques. Taking advantage of these tools allows you to craft a unique and powerful sonic landscape that perfectly complements your composition while also adding depth and texture to your project.

Maximizing Your Piano’s Sound Potential

When it comes to EQing a piano in FL Studio, there are a few key steps that can help you maximize your instrument’s sound potential. To begin with, it’s important to utilize the equalization tools available within the program. These include:


  • Low Cut Filter


  • Roll off frequencies below 80Hz


  • Remove any unwanted low end rumble or hum


  • High Pass Filter


  • Cut out frequencies above 10kHz


  • Prevents clipping and distortion


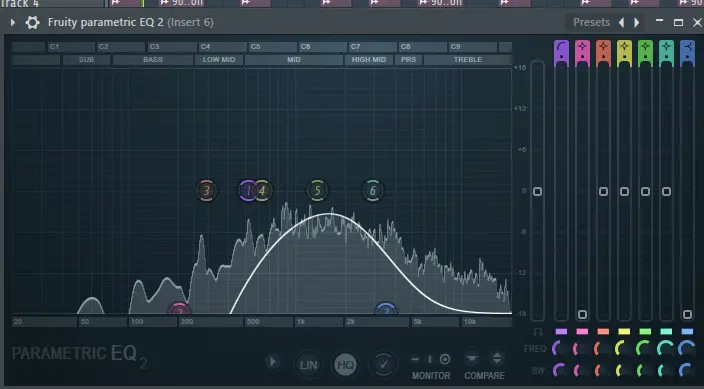
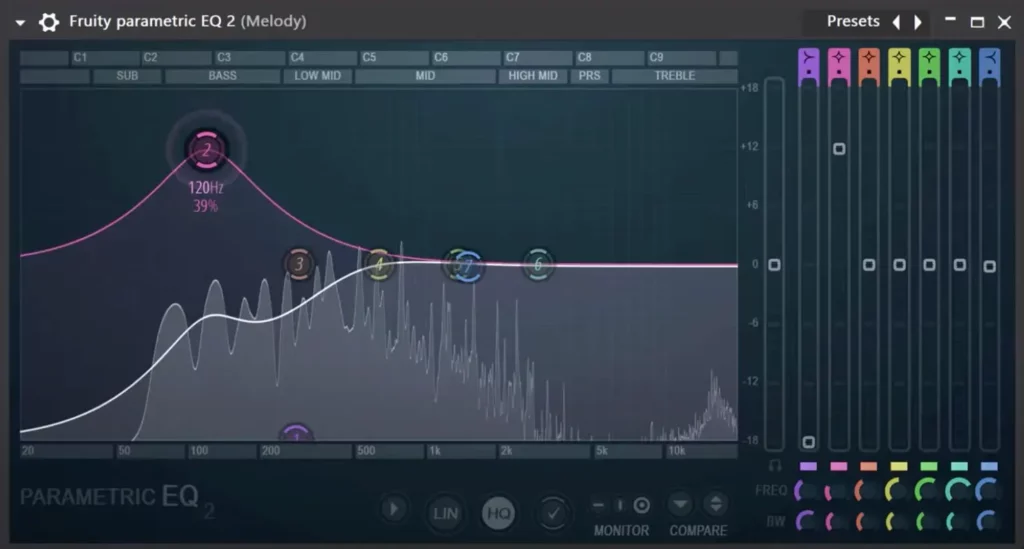
These filters will provide a clean starting point for further sculpting of your sound. Additionally, using an EQ plugin with more precise controls can be beneficial when it comes to fine tuning the frequency response. This is especially useful if you need to reduce muddiness in the mid range or add warmth around 100Hz.

EQing your piano doesn’t have to be complicated; just remember to use your ears as a reference point when making adjustments. Start by boosting frequencies one at a time until you reach desired results then sweep through each band individually and make minor tweaks where necessary. With patience and practice, you’ll soon find yourself creating professional sounding mixes with ease!

Frequently Asked Questions

What Are The Best Eq Plugins To Use In Fl Studio?

For those wanting the perfect sound mix, choosing the right eq plugins for their piano track in FL Studio is essential. Like a musician hitting each note with precision, finding that sweet spot of sonic perfection requires finesse and expertise.

To help you on your journey to sound mixing mastery, here’s a list of some of the best EQ plugins for FL Studio:

  • TDR Nova – A high-end dynamic equalizer plugin that allows for precise frequency adjustments.
  • FabFilter Pro Q 3 – An intuitive interface featuring several filter shapes and an extensive range of gains levels.
  • Izotope Ozone 8 Equalizer – A powerful multi-band parametric equalizer with integrated signal processing options like saturation and filtering.
  • Brainworx bx_digital V3 – This professional grade plugin offers eight bands of intelligent EQ control with mid/side functionality.

No matter which one you choose, these eq plugins are sure to take your piano track from lackluster to lush! With so many features available it can be difficult to find just the right settings for your project but don’t worry — experimentation is key here. Tweak away until you get the ideal sound balance between highs, mids, and lows while still maintaining clarity and dynamics throughout your mix. Whether you’re creating an orchestral masterpiece or looking to pump up bass frequencies in your latest EDM track, there’s an EQ plugin out there that will do the job right.

Achieving audio excellence isn’t easy but it’s worth it when you hear the finished product come alive through great sounding speakers or headphones — you’ll know all your hard work has paid off! So go ahead and start putting together some awesome mixes using eq plugins in FL Studio —you won’t regret it!

How Do I Adjust The Attack, Release, And Sustain Of My Piano Track?

When it comes to producing a piano track in FL Studio, adjusting the attack, release, and sustain of your sound is essential for achieving a polished end product. Knowing how to make these adjustments with equalization settings can be tricky, but there are some key steps you should take as an audio engineer to ensure that your sound is perfect.

First off, when making adjustments to the attack of your piano track, start by boosting or cutting frequencies around 1k-6 kHz – this will give you more control over the transient information of your sound. Next, set up an EQ band at 250 Hz and boost or cut depending on what kind of tone you’re after. For example:

  • Boosting this frequency range will add body and warmth to your sound;
  • Cutting will result in a brighter, punchier mix;
  • Adjustment in both directions can create a balanced blend between the two extremes.

In terms of altering the release portion of your piano track, try experimenting with different EQ settings within the low mids (250Hz-2kHz). A gentle boost here can help extend the decay time and increase definition overall. For creating subtle sustain levels in your recording, use high shelf filters above 10kHz for further tonal shaping. By doing so, you’ll find that you have much greater control over the dynamics and character of your final mix.

To achieve maximum results from eq settings on any instrument’s track in FL Studio requires careful tweaking – not only do you need to understand which frequencies affect certain aspects such as attack and sustain but also how small tweaks can drastically change the outcome of their project. With practice though comes mastery!

How Do I Create A Layered Piano Sound?

Creating a layered piano sound adds complexity and texture to your track. In this guide, we’ll discuss how you can use multi-tracking, sampling, or layering techniques to craft an impressive and unique piano sound.

Multi-sampling is the process of recording multiple samples of the same sound at different velocities. This technique allows for more realistic sounding recordings as each note will be played differently depending on its velocity. By using multi-sampled pianos, it’s easy to create detailed and expressive sounds that capture nuances in performance. Alternatively, you can also layer several piano tracks together to achieve a thicker and fuller tone with increased presence. To do this effectively, make sure each layer has been EQ’d appropriately so that it sits nicely within the mix without becoming too muddy or cluttered. Additionally, playing around with panning and stereo width effects can help bring out certain elements from each tracked instrument which makes them easier to distinguish in the overall mix.

These are just some basic tips on creating layered piano sounds but there are many other creative ways to take advantage of these techniques. Experimenting with different approaches can yield interesting results so don’t be afraid to get creative! With practice and patience, you’ll be able to craft stunningly immersive sonic landscapes with ease!

How Do I Make My Piano Sound More Realistic?

Have you ever had that moment where your piano track just doesn’t sound realistic? It may be because it’s lacking the emotional depth and realism of a real acoustic piano. While there are many ways to make a sampled or recorded piano sound more natural, let’s focus on how we can use EQ plugins in FL Studio to craft an incredibly realistic-sounding piano.

When trying to achieve a truly authentic-sounding piano, start by understanding the sonic character of an acoustic piano. Acoustic pianos have rich harmonic content due to their strings and hammers producing overtones when struck. To recreate this harmonically complex tone using EQ plugins, here are some tips:

  • Use low shelf filters with gentle slopes for subtle bottom end enhancement
  • Add slight resonance around 1kHz for warmth and clarity
  • Cut frequencies around 600Hz to reduce any muddy mid-range build up
  • Add high shelves at 10kHz or above for airy sparkle

These techniques will help give your sampled or recorded piano greater authenticity. You could also try layering multiple samples together, adding reverb or delay effects, or experimenting with other audio processing tools such as compression and saturation. All these options can help bring out different characteristics in the instrument so you can find a unique sound tailored specifically to your project!

Are There Any Tips For Mixing A Piano Track With Other Instruments?

Mixing a piano track with other instruments can be an intimidating task for those unfamiliar with the process. Whether you’re creating a composition from scratch or enhancing existing audio, it’s important to understand how to properly mix your piano and any accompanying instrumentation. Here are some useful tips for mixing a piano track with other elements:

  • Understand the frequency range of each sound source – Knowing the frequency range of each element in the mix will help you create balance between them while ensuring that no frequencies interfere with one another.
  • Panning is essential – Experiment with panning different sources across left and right channels to give space and clarity within the mix. This also helps when crafting stereo width on certain parts such as drums or synth pads that might otherwise drown out or mask the original piano part.
  • Automate volume levels – Utilizing automation allows you to make subtle adjustments throughout the song without having to manually move faders up and down every time something needs adjusting. This ensures all elements remain balanced even during transitions or dynamic changes.

As an audio engineer, it’s important to have a comprehensive understanding of both music theory and production techniques in order to achieve professional sounding mixes. When mixing piano tracks alongside other instruments, there are many factors involved; from shaping individual sounds through EQ, compression, delay processing etc., to carefully balancing levels so nothing gets lost in translation. It’s certainly not easy but by following these basic yet effective tips, anyone can begin their journey towards achieving perfect piano mixes!

Conclusion

As an experienced audio engineer, I can assure you that perfecting a piano sound in FL Studio is not as difficult as it may seem. With the right EQ plugins, attack and release settings, layered sounds, and mixing techniques, your piano track will be sounding better than ever!

My advice to all aspiring engineers out there? Don’t underestimate the power of EQ! When used correctly, it can make all the difference between a mediocre mix and one with professional production values. Experimentation is key – don’t be afraid to try different combinations until you find what works best for you. And finally: practice makes perfect! The more time you spend tweaking your tracks in FL Studio, the closer you’ll come to achieving perfection!

Looking for a one-stop-shop for all your music production needs?

“SoundShockAduio

Subscribe to SoundShockAudio and access our vast library of tools, including VST Plugins, DAW templates, sample packs, and more.

Need more help when it comes to EQing? Check out the article, how to eq on fl studio.

Also check out this other article how to eq pads, for more EQing tips.

Leave a Comment

Get Instant Access to Dreamy LoFi and Complete Drums Sample Packs

Take your drums and LoFi tracks to the next level. Sign up now and get access to over 1,250 free samples! 

The Largest Collection of Free Music Production Tools On the Internet